Showing posts with label Chobits. Show all posts

Monday, November 2, 2009

Chii with Egg Whisk WIP - Part III

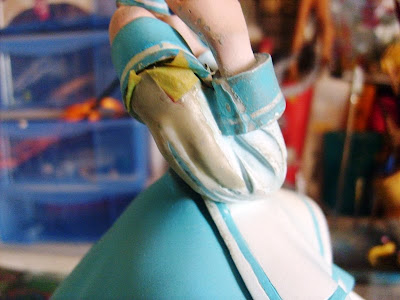
By the Murphy's law, here it is, the big problem! It's actually my fault for not realizing when I did the dry-fit that, other than the hair, another part had a major problem: her right arm. The arm didn't fit in the socket, a part of it protruded out and so I had to do a lot of grinding. Currently, her arm is covered in putty, hoping I will be able to make it presentable and to recreate at least some of the folds of the fabric.


Otherwise she'd be basically done. Of course her arm will need stripping and repainting... I also need to add some whipped cream around her face and clothes.
I'm especially happy with her face, it's the first time I paint Chobits-eyes and I wasn't sure about how to go for them. But I think they turned out ok.

Wednesday, October 28, 2009

Chii with Egg Whisk WIP - Part II

Yesterday I needed to take a break from Saber and Sakura, so I decided to start on Chii with Egg Whisk. I did start working on her hair months ago to tell the truth, as it was the only problematic part of the model. If you are interested in seeing how bad it was, you can find it here:

http://stuff-from-misato.blogspot.com/2008/10/asuka-angel-wip-strike-ii-and-while-we.html

It was like the parts were from different models, so much the fit was bad. It took me hours and hours of different kind of putty and a lot of sanding, to get a result that is not even decent in my book. But I can't let a piece of plastic to ruin my life, right? So I went ahead:


And to my surprise, I almost finished it in only one day! If nothing happens, tonight she'll be ready.. though she's supposed to be part of a diorama I'm planning, involving two more figures and a lot of Re-Ment goodies. Problem is, this diorama is growing in my head by the minute, and as it is I already don't know where to display it! ^_^;


So, this is Chii so far:

Wednesday, October 8, 2008

Asuka Angel WIP- Strike II! (And while we are at it, Chii's hair!)

Here are the photos: I can't believe the first time I managed to put this Asuka together in 3 or 4 days... the joints are driving me crazy! Since this is a naked model, I decided to pre-assemble everything, which is always rather annoying... but at this point it's the best solution I guess. So, here we go:


As usual I used Aves Apoxie putty, bondo and Vallejo grey primer. Paper clips in the joints as pins and 2 parts epoxy glue.


This is a gift for one of my best friends; she isn't into anime though, and knows nothing (and cares nothing) about Evangelion (my blood went cold just typing the sentence... brrr!). So she asked me to give Asuka purple hair and purple eyes. At first I was horrified, but now I'm kinda glad as I hate repainting the same model more than once and this way at least she looks somewhat different (or at least I'm trying to convince myself of it!).

Unfortunately, no matter how many times I tried in different settings, I can't get a decent photo of her hair color... I hope I'll be able to get when I take the definitive ones, but so far this is the best I could do, which sucks!


In reality it's much less blue, but oh well!
While waiting for putty and primer to dry, I started working on something else. I know I have plenty of models so close to be finished that the logic thing to do would be to finish them, but hey, logic starts where I end!
So I decided to start assembling Chii's hair... as I said in my previous post, it seems like the parts were not even from the same kit! So I pinned, applied epoxy putty, dremeled, sanded, primed, applied bondo, and then repeated two more times. When I thought I was finally done, one of the two hair parts broke again twice, in spite of pins, two kinds of putty and epoxy glue! I really don't know what else to do, maybe I should have used a stronger pin but at the moment I'm giving it one last shot as it is.
Here you find the photos of only one of the passages I described above:


As said, I've repeated these passages more than once and now I'm about to fix the broken part again, while the other one looks smooth enough (well, not enough yet, but close). I'll try to update as I go...